
OpenCart Custom theme development and integration


Well, Opencart is a lightweight, opensource and relatively fast e-commerce framework. We can easily setup our store with opencart. It's built with PHP and Mysql (for database).

So, setting up theme for our store is an important part when creating a web store. The user interface and design plays a key role in any e-commerce store.

In Opencart, we can integrate our custom theme too. For this, we need to create a basic html (mockup) of our custom design.

1. Then, install opencart if not installed. If already installed, go to catalog/view/theme folder.
2. There we can see the default theme of opencart. Copy the contents of that theme and create another theme for eg. catalog/view/theme/mytheme. "mytheme" is the new theme.
3. Paste the contents of the default theme on this newly created one.
4. Now, we need to modify the contents of the copied theme.
5. The folder structure of any theme is like as shown below:


i. The "font" folder will have the extra fonts.
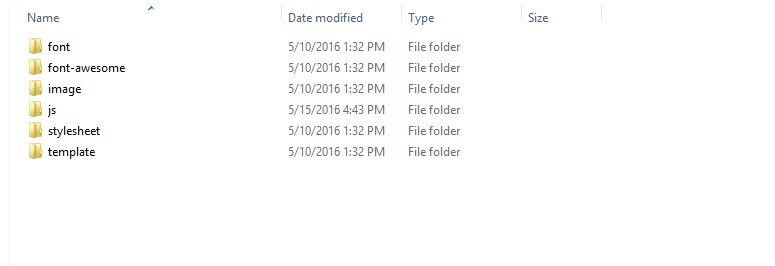
ii. Image folder contains the images. The images of the newly created theme should be placed here.
iii. Js folder have the javascript files. The js files should be stored here.
iv. Stylesheet contains the css of the theme. The css, styles are stored here.
v. Template contains all the html files.


6.  Inside "Template" folder, we can see sub-folders for each part of the store, like account,checkout,common,product etc. Inside each sub-folder, there are template files that contain the html.
7. We may need to modify each template file to achieve the design as we need.
8. But the most important part is the header, home and footer section.
9. To modify these, go to common folder.There we have header.tpl, home.tpl and footer.tpl. There are also other template files that we need later.
10. Open header.tpl to modify the header section. Integrate the html,css as per the new design. Likewise do the same for footer.tpl, home.tpl.
11. After modifying and integrating the changes, we need to activate the new theme.
12. For that, go to admin panel. Usually it is under http:yoursite.com/admin.
13. After loggin in, navigate to system/setttings.
14. There we can see the list of stores.
15. For now, view the default store. Then under the "Store" tab, we can see the Template section.
16. On the drop-down, we can see our newly created theme. Apply the new theme we just created.
17. Voila!! now go to frontend and you can see your new theme look.


Comments

Popular posts from this blog

Magento 2.3 Admin panel blank issue

After the Installation of Magento from the composer, we cannot access the admin panel. Also, the deploy command doesn't work. (On Windows 10 OS). Note: Magento 2.3 supports Linux OS. Windows and Mac OS is not supported. This is a Magento bug. Wrong paths to Windows are generated. The fixed fix is Magento 2.3.0 - 2.3.3 #/vendor/magento/framework/View/Element/Template/File/Validator.php:140 the string if (0 === strpos($realPath, $directory)) {     return true; } to replace $realDirectory = $this->fileDriver->getRealPath($directory); if (0 === strpos($realPath, $realDirectory)) {    return true; } Magento 2.2.7 /vendor/magento/framework/View/Element/Template/File/Validator.php:113 code protected function isPathInDirectories($path, $directories) {     if (!is_array($directories)) {         $directories = (array)$directories;     }     foreach ($directories as $directory) {   ...

Error on payment method when placing order "No Such Entity With Cart ID"

No Such Entity With Cart ID Error on payment method when placing order. If you receive the error message " No such entity. ", " No such entity with " or "No such entity with  customerId,OrderId " in Magento 2, the issue usually occurred when you try to load not existing object via Magento 2 Repository Class. To debug this issue, please open the file vendor/magento/framework/Exception/NoSuchEntityException.php and at the beginning of the  __construct  method temporary add debug backtrace code: foreach ( debug_backtrace () as $_stack ) { echo ( $_stack [ "file" ] ? $_stack [ "file" ] : '' ) . ':' . ( $_stack [ "line" ] ? $_stack [ "line" ] : '' ) . ' - ' . ( $_stack [ "function" ] ? $_stack [ "function" ] : '' ); } exit (); example: public function __construct ( Phrase $phrase = null , \...

Magento js validation message translation

Magento includes the translator library to translate the js messages that appear on our site. The translator js is already included at the head. To translate our messages, we just need to add the text to transator. For eg: This translator code needs to be added on our phtml file.  Translator.add('Select a color.', "<?php echo $this->__('Select a color.');?>"); Then we need to add the text to translate at locale file i.e translate.csv at the locale folder. However, this will not work for prototype js validation messages that appear on checkout pages. e.g. "This is a required field." etc. To translate these validation messages, we need to we’ll override Magento’s validate method. For that, we need to create an external js file and place it under js folder. For eg: js/lib/translatejs.js Validation.addAllThese([     ['validate-no-html-tags', Translator.translate('HTML tags are not allowed'), function(v) ...